
Trail cameras have become essential tools for wildlife enthusiasts and security-conscious individuals alike. These versatile devices not only enable you to observe and document animal behavior in their natural habitat but also serve as reliable surveillance instruments for property monitoring.
Programming a trail camera may seem daunting at first, but with a few simple steps, you can set up your camera to capture high-quality images and videos. Key steps include selecting the right location, adjusting date and time settings, configuring motion sensors, and customizing image resolution and storage preferences.
With proper programming, your trail camera will be ready to capture the hidden wonders of nature or safeguard your property effectively.
What is a Trail Camera?
A trail camera, also known as a game camera or wildlife camera, is a small and discreet device used to capture images or videos of animals in their natural habitat. Originally designed for hunters to track and monitor game movements, these cameras have gained popularity among nature enthusiasts, researchers, and even homeowners looking to monitor their property.
Trail cameras are typically weather-resistant and equipped with motion sensors that trigger the camera's shutter when an animal or human passes by. They can be set up in remote areas without the need for electricity or internet connection, making them a convenient tool for studying elusive animals or monitoring remote properties.
The captured images and videos can provide valuable insights into animal behavior and help conservation efforts. With advancements in technology, trail cameras now come with features such as high-resolution images and videos, infrared night vision, and wireless connectivity.
Types of Trail Cameras
There are several types of trail cameras available in the market, each with its unique features and capabilities. Some common types include:
- Infrared (IR) Trail Cameras: These cameras use infrared technology to capture images or videos without emitting any visible light. They are ideal for covert surveillance and capturing images at night.
- Flash Trail Cameras: Flash cameras use a bright flash to capture color images or videos during the day and night. However, the visible flash may startle animals, making them less suitable for wildlife observation.
- No-Glow Trail Cameras: Similar to IR cameras, no-glow cameras also use infrared technology but emit no visible light, making them virtually undetectable by animals or humans.
- Wireless Trail Cameras: These cameras utilize cellular or Wi-Fi connectivity to transmit images and videos wirelessly to a designated device. This feature allows for real-time monitoring, making them ideal for security purposes.
These are just some of the many types of trail cameras available, and choosing the right one depends on your specific needs and budget.
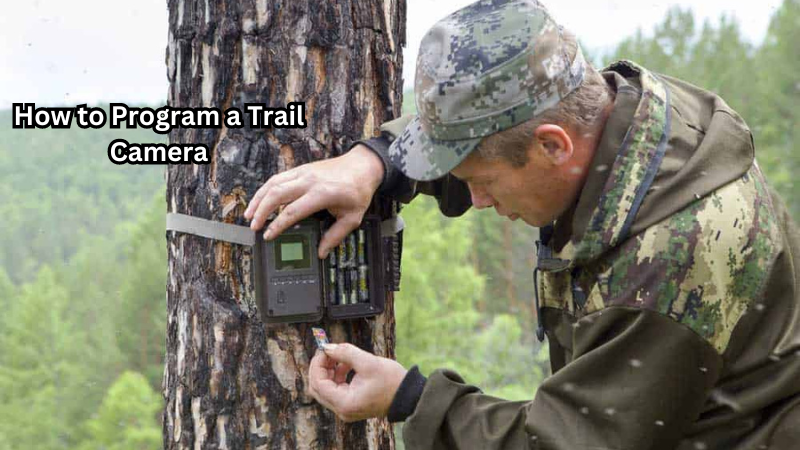
How to Program a Trail Camera
Now that you have a basic understanding of trail cameras let's dive into the steps to program one for optimal use.
Choosing the Right Location
Selecting the right location for your trail camera is crucial to ensure successful image capture. Ideally, you want to place it in an area with high animal activity or where you suspect animals will pass by frequently. Look for well-traveled trails, watering holes, food sources, or any signs of animal presence such as droppings or tracks.
Make sure to also consider the height and angle at which you position your camera. Placing it too low can result in blurry or obstructed images, while positioning it too high may make it more susceptible to theft or damage from wildlife.
Adjusting Date and Time Settings
Setting the correct date and time on your trail camera is essential for accurate documentation of animal behavior. Most cameras have a built-in clock that you can adjust manually or synchronize with GPS satellites. Some models also allow you to schedule specific times for the camera to be active, saving battery life and preventing false triggers.
It's important to ensure that your camera's date and time are regularly updated, especially when using it over long periods. This will help maintain consistency in your data collection.
Configuring Motion Sensors
Motion sensors are an integral part of trail cameras as they detect movement and trigger image capture. You can typically adjust the sensitivity and range of these sensors to avoid false triggers from small animals or plants swaying in the wind.
Experiment with different sensitivity levels to find the sweet spot for your camera's location. However, keep in mind that higher sensitivity may result in more battery usage. Additionally, you can also choose between single-shot or burst mode, which captures multiple images in quick succession when motion is detected.
Customizing Image Resolution and Storage Preferences
Most trail cameras allow you to customize image resolution and storage preferences according to your needs. Higher resolutions will result in larger file sizes but provide more detail in images. Consider your desired use for the camera when selecting image quality.
You can also choose between storing images on a memory card or using wireless connectivity to transfer them to a remote location. Some cameras even have the option for cloud storage, providing an added layer of security and convenience.
Test and Fine-Tune Settings
Before leaving your trail camera unattended, it is crucial to test and fine-tune all settings in the field. This step will help you ensure that everything is working correctly and make any necessary adjustments before relying on the camera for long periods.
Take some test shots from different angles and distances to see how the images turn out. Make sure that motion sensors are triggering properly and adjust sensitivity levels if needed. It's also a good idea to check battery life and swap out batteries if necessary.
Tips for Effective Trail Camera Usage
To make the most out of your trail camera, here are some additional tips to keep in mind:
- Use multiple cameras: Placing multiple cameras in different locations can provide a more comprehensive understanding of animal behavior and increase your chances of capturing rare or elusive species.
- Avoid direct sunlight: Direct sunlight can create glare or wash out images. Try positioning your camera so that it is facing north or south for optimal lighting.
- Secure your camera: To prevent theft or damage from wildlife, consider securing your camera with a lockbox or cable lock. You can also camouflage it with natural materials to make it less noticeable.
- Regularly check memory cards: Periodically check and replace memory cards to ensure that your camera can continue capturing images without interruption.
- Follow local regulations: Before using a trail camera, make sure to familiarize yourself with any relevant state or federal laws and regulations. Some areas may require permits for camera usage, and it's essential to respect wildlife and their habitats.
By following these tips and understanding how to program your trail camera effectively, you can maximize its potential for wildlife observation, security purposes, or whatever use you have in mind.
Common Mistakes to Avoid
While trail cameras are relatively simple to use, there are some common mistakes that you should avoid to ensure the best results:
- Not checking for obstructions: Before leaving your camera in place, make sure that there are no branches or other objects blocking the view of the lens.
- Not using a security code: If your camera has a password or PIN option, make sure to utilize it for added protection against theft.
- Failing to maintain batteries: Make sure to regularly check and replace batteries as needed. Dead batteries can cause your camera to stop functioning, resulting in missed opportunities for image capture.
- Overlooking SD card capacity: Be aware of how much storage space your camera has and how many images it can hold. If you plan on leaving it unattended for long periods, consider using a larger capacity memory card.
With these tips in mind, you can confidently program and use your trail camera to its full potential. Whether you're a wildlife enthusiast, researcher, or hunter, this powerful tool can provide valuable insights into the natural world around us.
What is Most Valuable Information You Can Get from Trail Cameras?
Trail cameras can provide a wealth of information about animal behavior, population dynamics, and habitat usage. Here are some valuable insights that you can gain from using trail cameras:
- Identification of species: With clear images or videos captured by your camera, you can accurately identify the species frequenting a specific location.
- Animal behavior patterns: By capturing multiple images over time, you can observe behavioral patterns such as feeding habits, mating rituals, and movement patterns.
- Population estimates: By monitoring the frequency and number of individuals captured in images, you can make estimates of wildlife populations in a particular area.
- Habitat usage: Trail cameras placed in different locations can help determine which areas are most used by wildlife, providing insights into their preferred habitats and potential threats.
- Rare or elusive species sightings: Trail cameras can capture images of rare or elusive species that may be difficult to observe through traditional methods, providing valuable data for conservation efforts.
These are just a few examples of the valuable information that trail cameras can provide. The data collected by these devices can aid in wildlife management and conservation efforts, as well as provide educational and research opportunities for enthusiasts.
FAQs
How do I choose the best trail camera location?
Choosing the best trail camera location involves finding an area with high wildlife activity, such as animal trails, water sources, or feeding areas. Proper camera placement is crucial for capturing quality trail camera photos. Ensure the detection zone covers the expected path of the animals and place the camera at a height and angle that avoids direct sunlight to minimize glare and false triggers.
What are the best trail camera settings for capturing clear photos?
The best trail camera settings for capturing clear photos include setting the detection range and sensitivity according to the environment and wildlife activity. Adjust the resolution to the highest setting for detailed images and set the camera to burst mode to capture multiple shots in quick succession. For video mode, ensure the length of the video is sufficient to capture animal behavior without draining the battery quickly.
How do I program a cellular trail camera for remote access?
To program a cellular trail cameras for remote access, start by selecting a location with strong cellular signal. Follow the manufacturer’s instructions to activate the cellular camera and set up the cellular plan. Adjust the trail camera settings to upload photos and videos at desired intervals. Using the associated app or website, you can remotely access and manage your trail cam, ensuring you receive real-time updates and photos.
What should I consider for optimal camera placement and settings in game cameras?
For optimal camera placement and settings in game cameras, consider the detection range and zone to ensure the camera captures the intended wildlife activity. Position the trail cam at a height that matches the size of the animals you are monitoring, typically around knee to waist height. Adjust the trail camera settings to balance sensitivity and reduce false triggers from moving vegetation or direct sunlight. Ensure the trail camera location is secure and discreet to prevent tampering or theft.
Conclusion
In conclusion, programming a trail camera is a straightforward process that unlocks a world of benefits for both wildlife enthusiasts and security-minded individuals.
By carefully selecting the location, setting the date and time, configuring motion sensors, and customizing image resolution and storage, you ensure your device operates at its best.
Properly programmed trail cameras provide invaluable insights into animal behavior in their natural habitats and act as reliable surveillance tools for property protection. With attention to detail and a bit of practice, you can maximize the potential of your trail camera, making it an indispensable part of your outdoor or security toolkit.